How to give your gameboycamera pictures a nicer palette 
9.9.21, 10:04 - nintendo
gepostet von web doc
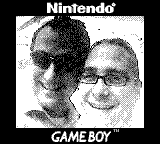
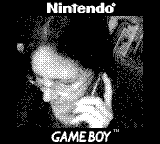
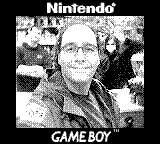
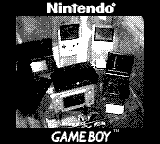
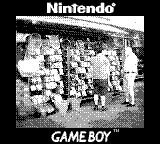
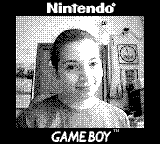
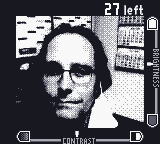
This is a little excurse in how to get a nicer color into your gameboy camera pictures.
The original pictures have a fixed 4 color greyscale palette. For example black, dark grey, light grey and white (or in values: #000000 #555555 #AAAAAA and #FFFFFF).

To make this more eye friendly, you can use any paint program to alter the colors. Very easy to use is the online pixel editor of lospec. ( https://lospec.com/pixel-editor/app )
They even offer some pretested Gameboy palettes. ( https://lospec.com/palette-list/tag/gameboy )

The more elegant way is to change all pictures with one line of code.
I suggest you first find a palette that does not hurt your eyes.

Now we need a translation table in the format
#000000 #060329
#555555 #8D25DF
#AAAAAA #EC93C9
#FFFFFF #F2FFB0
#inputcolor #outputcolor - for all 4 colors (use a color picking tool or see the instructions below if you are very lazy...)

Save this table to a file called mapped.txt

Now you can use the excellent script called 'mapcolors' http://www.fmwconcepts.com/imagemagick/ ... /index.php
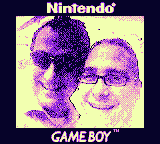
./mapcolors -m -f mapped.txt original.png colorized.png
This produces a colorful picture out of any original greyscaled gameboy picture... tadaaaaa

As I am not happy with the manual solution, I use the command line to obtain the color values and write the table...:

1. Extract the colors of a picture with one line of imagemagicks 'convert' tool:
convert colorized.png -unique-colors -scale 1000% palette.png
This outputs a little 'palette.png' just containing the 4 colors.

2. The used colors in your palette can be cut out by
identify -verbose palette.png |grep 100 | cut -d " "  -f7 |cut -c -7 |sort
Do this for the original picture and the eyefriendly picture. Now we have four original color values (#000000 #555555 #AAAAAA and #FFFFFF ) that have to be changed to the new ones in our examlpe above ( #060329 #8D25DF #EC93C9 #F2FFB0 )

3. Save both, the original and the new color map into files and merge them.
paste -d\  original.txt neu.txt >mapped.txt

4. And here is the final solution: extract the colors and create the table all you need are the original.png and colorized.png :
convert original.png -unique-colors -scale 1000% originalpalette.png
convert colorized.png -unique-colors -scale 1000% palette.png
identify -verbose originalpalette.png |grep 100 | cut -d " " -f7 |cut -c -7 |sort >original.txt
identify -verbose palette.png |grep 100 | cut -d " " -f7 |cut -c -7 |sort >neu.txt
paste -d\ original.txt neu.txt >mapped.txt
The new file is the Translation Table

I've spend too much time on this :D
Übertragen von Bildern der Gameboy Camera Teil 4 
6.9.21, 09:55 - nintendo
gepostet von web doc
Und der gefühlt 10. Eintrag zu einem meiner Lieblings Themen:
Die Gameboy Camera und wie man die Bilder auf einen modernen PC überspielt

Siehe Teil 1, Teil 2 und Teil 3

In einem meiner letzten Beiträge berichtete ich über den USB to Gameboy Link Cable adapter , ein kleines Pi-pico getriebenes Gerät, welches die Signale aus dem Gameboy Link Kabel in den USB bus übersetzt. Es wurde benutzt um Tetris gegen den Rest der Welt zu spielen.

Die logische Schlußfolgerung ist natürlich das "drucken" von Gameboy Camera Bildern.
Auf der Website https://printer.stacksmashing.net befindet sich ein Druckeremulator und die passende Firmware für den Pi pico.

Das ist mit Abstand die einfachste Art Gameboy Bilder auf einen modernen PC zu bekommen.

Hier ein paar Schnappschüsse:


Die Bilder haben die typischen vier Farben. Beim Hochladen nach twitter etc. werden diese Bilder leider in jpg mit ihrer Kompression umgewandelt und sogar skaliert( - ein generelles Problem bei Pixelart!). Sieht echt mies aus. Aber es gibt eine Lösung: png's mit Alphakanal und Tranzparenz werden nicht umgewandelt.... Um euch das Leben einfacher zu machen gibt es ein tolles Webtool, welches das übernimmt:
https://lospec.com/pixel-art-uploader/

Viel Spass, bleibt kindisch,

So long, euer
webdoktor

The USB2GameBoy Link Cable 
12.6.21, 15:46 - retro & C64, nintendo
gepostet von web doc

... and how to play the original Gameboy Tetris against players in the whole world.


Dear Ladies and Gentlemen, I introduce to you the

USB to GameBoy Link Cable


This little adapter (a 4$ RaspberryPi pico equipped with some levelshifters and the plug for the Link Cable) makes it possible to connect to a server, where players around the globe can compete.
The creator, Stacksmashing, offers prebuild pcb's where you only have to solder the RaspberryPi Pico.


Do I need to say that I ordered the Hardware immediately?
Soldering was straight forward and easy, and would be even for beginners and programming the PiPico is literally just drag and drop.
After connecting the hardware you have to visit the site https://tetris.stacksmashing.net/ with the chrome or edge browser (as they allow webUSB).

Your running Tetris game will automatically be detected, and you can join or create a round. Finding opponents works for example through the inventors discord channel ( https://discord.gg/YASkVQY5Pr ). Really nice people are awaiting other players.

A round can host up to 6 players at once.

It is really a fun toy with hopefully more applications to come.
Ach so: I won,


Stay childish
Yours,
WebDoc

3DS Homebrew, Gameboy Emulator and new Gameboy Camera Adventures 
17.8.20, 16:46 - nintendo
gepostet von web doc
My weekend was filled (successfully) with Nintendo 3DS Adventures.
Since long time I've wanted to change the original firmware of my Nintendo 3DS to a custom one, mostly to use the old black brick for Homebrew Software and emulation purposes. (No new Games released since a long time anyway, so, hey, why not.)
https://3ds.hacks.guide/de_DE/
On this site, every single step is explained. There is nearly (*) nothing you can do wrong if you can read.
(*) I had to get a new Nintendo ID and reset my 3DS to get the MagicSeed. 2nd problem was that one directory needed to have two entries...completely silly, but I got it after a while (Godmode9.firm in luma/payloads/ just needed to be copied)

The whole thing took about 2 hours of reading, downloading, computing the magic seed, and so on.


I've installed mGBA, a Gameboy emulator for gb, gbc and gba games and noticed in the configuration menu that there is the option to enable a camera.... well I gave it a try and guess what:


If the Game Boy Camera Cartridge is loaded, you can emulate the Gameboy Camera completely on your 3DS.

And the pictures are stored in the Save file on the SD Card, which can be extracted using this little online tool:
https://www.raphnet.net/programmation/gbcam2png/gbcamtool.html


HA! It's getting easier every time to use the GB Camera with modern PC :D

So long,
Euer Webdoktor


Übertragen von Bildern der Gameboy Camera Teil 2 
14.12.19, 18:26 - nintendo
gepostet von web doc
Ich habe wenn ich mich nicht irre schon einmal von meiner Gameboy Camera erzählt. Um die Bilder von dem Kameraaufsatz zu holen habe ich mir seinerzeit ohne viel Aufwand ein Adapterkabel gebastelt, welches mit einer uralt Software unter DOS angesteuert wird. Diese DOS Software ist eine Art Drucker Emulator (es gab mal einen kleinen Thermodrucker für den Gameboy)
Leider ist die Verbindung Gameboy <-> DOS instabil und es braucht immer mehrere Versuche ein Bild runterzuladen. Ausserdem ist das Bild dann auf einem DOS Rechner und nicht auf meinem modernen PC um es weiter zu bearbeiten.

Vor ein paar Tagen bin ich über eine andere Art der Datenübertragung gestoßen: Es gab mal einen Aufsatz namens "Transfer Pak" für den Nintendo N64 mit dem man Speicherstände u.ä. von einem Gameboy Pokemon Cart auf den N64 zu übertragen.


Findige Programmierer haben weiterhin eine kleine Software gebaut um nicht nur Pokemon Daten auszulesen, sondern nahezu alles, was eingelegt wird. Und da ich über einen dieser SD Kartenadapter für den N64 (Everdrive64, ED64 V2.5) verfüge, habe ich dem ganzen mal eine Chance gegeben. Der Weg ist nung folgender: GB Cam -> N64 -> SD Card -> PC


Probleme: ALLE Links auf die aktuelle Version des N64 Programs sind tot.
Der Programierer saturnu hat sie auf ganz komische Filehoster verteilt, die alle nicht mehr existieren.

Ich habe in einem Forum letztendlich doch noch einen Link zu einer neuen Version gefunden, ältere Versionen lesen keine GB Camera Carts!

Ist es einmal gestartet, kann man die Inhalte auf der SD Card abspeichern.


Da das Programm nahezu verschwunden zu sein scheint, hier die letzte Version von gb64_v0633 (für Everdrive V 2 & 2.5)
@saturnu: Wenn du das nicht OK findest, schreibe mir eine Mail! Es ist Dein Werk und Du darfst entscheiden was damit passiert.

Bekannte Probleme:
Es erscheint (off) hinter "write ram"
Lösung: die hier liegende Programmversion nutzen!
Es steht nicht der Name des GB Carts da, sondern "check connection"
Lösung: Die Kontakte sind nicht die Besten. N64 aus, blasen und wieder an machen. In den Hilfestellungen der Foren war die Rede von Cart 1mm rausziehen, z drücken und software neu starten (N64 darf an bleiben bei dieser Version)


so long
webdoc

| 1 | 2 | 3 | 4 | 5 | 6 | Weiter> omega>>